
Drafting . Draping . Sewing

Drafting a bustier

Drafting the Master Plan


To draft the bustier, we had to first measure the tailor dummy so that it will be tight-fitted to the tailor dummy. So we measured above bust, under bust, bust level , mid hip and hip. Mid hip will be 10 cm above hip, above bust is 6.5 cm above bust and under bust is 7 cm under the bust.
Measurements are as follows on the tailor dummy: (cm)
Above bust: 86
Bust: 86
Waist: 65
Mid hip: 81.5
Under bust: 74
Hips: 83
For the front side seam, to make it fitted, we went in 1cm at the bust and 0.8cm at the waistline and hem. At the above bust level, we went out 0.75cm at the dart and created a notch at the meeting point between two panels. We also did a slide curve at the top of the front side seam and made sure it matched with the back side seam without any angle and it was a smooth line. For the darts we had to also smooth out the line and go out by 0.5cm and we refined the curve so that the line is not too tensed. Then we compared the length of the bust, waist, mid hip and hips to the measurements we measured in the tailor dummy, they should match the draft block. If it did not match we had to change the measurements accordingly to match the tailor dummy.
For the back, we did the same thing as we did to the front. The last check was to check if there were any awkward angles, and if there was we had to smoothen the line by matching the side seam of the front and back together. For the hem there should be a smooth curve with a 90 degree angle toward the side seam.
Final Patterns


For the final patterns, after adding the grain-lines and description, we added the seam allowance. The side seam seam allowances were 1.5cm, the centre back had a 2cm allowance and the rest were 1cm allowances. It was important to also add the notches so that when we are sewing on later, it will be easier to match them. When adding the notches, it is important to note that it is marked at a 90 degree angle.
Sewing Bustier


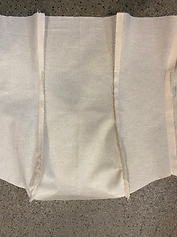
final outcome


cutting the fabric
according to final
patterns


The sewing process of the bustier was rather straightforward if all the notches and seam allowance are marked properly and sewed accordingly. For the side seams and the back since they are identical it is important to mark the wrong side and right side so that when you sew them they are matched correctly. I realised the first time when I sewed it I did not mark right side and wrong side and realised I could not sew them together cause they did not match. After matching and sewing all the parts correctly, I folded and ironed the 2cm allowance. Then I pinned it on to the tailor dummy and it fitted perfectly.
Draping Research & Exploration


To design my draping garment, I first did some research on the type of drape I wanted. I wanted to incorporate a big structure bow idea and as well as a very tight draped look. I also wanted to incorporate the idea of a cowl back but I was not very sure yet. I looked at some red carpet looks of draped gowns which I really liked. I wanted to do an exposed bustier, then I realised that my design was very much inspired by the modern Indian sari where it is draped over a blouse and most of the time the blouse/bustier is exposed.

I wanted to combine the idea of this two designs for my back.


For the back designs, I was not sure on what will look well with the front so I came out with three back designs to consult on with my lecturer. We decided that the side draped starting from the shoulder down will be a good idea and it will fall beautifully if it is draped on bias. I also did not want the wearer to feel uncomfortable and make the back look too puffy on the drapes. So after the consultation and researching on more inspiration pieces, I had a final sketch on my design.
With much research on the bow and how well I wanted my garment to drape, this was my final sketch design. I am still unsure about how to drape a huge bow, but I am going to try and explore with the type of fabrics I have. I do want it to be structured and also at the same time want it to be draped well. My vision of this garment was to combine the elements of the traditional indian sari into a modern evening wear.


Reference images on oversized bows on evening gowns.


I first started draping by doing pleats from the bust to the shoulder. However, I realised that the pleats were too tight and was not the way I wanted, I was draping it wrongly from the shoulder to bust instead of bust to shoulder. I took the pins out and re-draped it forming pleats from under the bust moving up to the shoulder.
Since I wanted an exposed bustier, I wanted the pleats to sit nicely under the bust joining together with the side seam. I liked how the pleats were formed it was not too much and just nice. It was challenging trying to hold the drapes because of the fabric being too slippery.
Then, I used the style tape to mark the armhole as the style tape that was already on the dummy was too close to the underarm. I had to also mark the cut out shape in the stomach with the style tape so I can drape around it.
Draping process
I did not want to form too many pleats under the bust and wanted it to fall nicely below the bust. Once I was happy with the pleating following up to the shoulder, I cut i according to the marked style tape cut out leaving some seam allowance by tucking it in. Then at the same time, I also cut the armhole leaving a 1cm seam allowance.
After doing the pleats at the top and pinning them down, I moved on to the pleats at the hips. I followed the style tape and pleated from there, since the dress is a tight dress I wanted the pleats to look tight both at the bust and the hips. After pinning down the pleats at the hips, I moved on to the more challenging part of my drape which is my back.

For my back, the inspiration is from the picture above. This was really challenging because I had to ensure that each pleat has to be equal and to drape this I had to use the bias grain so that the drape falls nicely. I first pleated at the shoulder and followed to the other side where I wanted the strap which I added later on to end. The back idea was very much inspired by a cowl neck but over here I did it at the back.
There was many times I had to unpin and pin it again, because I felt like it was not draping properly and there was always excess fabric falling out, so I really made sure each pleat fold I did I pinned it down at the shoulder seam and 3 cm below it. I wanted the back to be low, so I marked how low I wanted it to be with a style tape. Then I realised actually the lower it is, it will drape more so I moved the back drape lower and liked the way it draped better.


THESE PICTURES ARE THE CURRENT PROGRESS OF THE DRAPE AT THE MOMENT OF THE FRONT AND BACK


FRONT pleats
Patterns for skirt base

FRONT

BACK
I had to draft out an inner garment (skirt) for my dress so that I can drape around it for my dress. I first had to draft my skirt by extending down from my bustier pattern from the waist and lengthen down 40 cm on the right and 35 cm on the left. This will give an unbalanced asymmetrical dress hem according to my illustration. Then I drafted out the final pattern which is from the bustier hem down. After sewing the inner garment, I pinned it on my tailor dummy. Following the inner garment hem, I cut my fabric around it. After cutting the dress, I realise the dress is too a-line but I wanted it to be tight at the side seam so I had to drape it tighter at the side seams.
Then I measured the length of the strap I wanted and sewed the strap and pin to the back of where my cowl back drape ended. I pinned the strap and later covered the strap by pinning the drape above the strap. I pinned more at the right side of the back drape because I really wanted it to secure well together and was afraid it would be too heavy and cause the fabric to snag.
Then I had to cut the bustier shorter so that it does not cover the whole back and now after cutting the bustier shorter, it looks neater and the cut out looks more obvious. At the side seam on the left, I added another small panel of fabric at the side where I would put the bow on. At first I wanted to stretch the cut out to the side seam but It would be too much and the garment will not sit as well, it will be drooping as the cut out maybe too big.
I started to tack all the important pleats and the side seam and ensured that everything was secured well together with the bustier and the inner garment. It was taxing trying to tie the bow because initially I wanted the bow to drape long but due to time constraint and I was running out of fabric, I could not drape the bow as long as how I illustrated it. Then, I decided I should do a short bow but a structured one so I added a mixture of tulle and my fabric to tie the bow. It was difficult to the tie the bow with equal weight at both sides because it was very thick and I was worried on how I could tack it to the garment without causing breakage to the fabric.
The bow was the last step of my drape, I was afraid because it was too thick, I may not be able to tack it to the side panel and at first I had a lot of difficulties attaching it to the garment and I felt like I was tacking too much and it caused my fabric to snag a bit. Then, I used the side of the bow where it does not have thick fabric to tack just a little on the garment. I liked how the bow later sits on my garment and it completed my look.


FRONT
SIDE SEAM
BACK


REFLECTION

This is my final drape results after tacking, I tacked mainly at the pleats on the bust, the hips and my cowl pleats at the back. Then I also had to secured my side seam, the hem and the strap so I tacked it ensuring its together with the bustier and the inner garment skirt.
My challenges for this drape was draping using polyester satin, it was really light and slippery and sometimes when I pinned it down it tends to create holes on the fabric. It creates a lovely drape for a gorgeous flowing look and I thought that my illustration was quite flowing which is why I decided to use this fabric even though it can be challenging.

Though it was challenging the drape turned out well with polyester satin. There was some changes to my illustration, the bow was supposed to be longer but due to the limited fabric I had, I could not do that. Another take away from this draping assignment is that during tacking, it has to be tacked properly and securely strongly so that when removed from the tailor dummy it would not unravel.
I really enjoyed this draping process, even though at the start I was confused and clueless on how to start, I realised with each step leading to another, I was able to drape at my own pace and got to the final result. Draping has always been something I struggled with especially from last semester but this assignment was a learning process and I learnt to be more confident and helped me expand my thinking creative skills.
Final Fashion Illustration
FRONT


BACK


Having a technical flats is really important before constructing a garment. It is laid flat to show all seams, topstitching, hardware, and design details. This helps both designer and the pattern maker throughout the entire garment making process.
DRAFTING - CREATING MASTER PLANS, INTERMEDIATE AND FINAL PATTERNS
MASTER PLAN TOP FRONT/BACK ANNOTATIONS

I wanted my top to be really
cropped right under the bust
line, so I did the hem 8cm down
from the bust point
For the centre front, I
came out 7cm so that
it will give me the flap
and the lapel I wanted
to mimic a biker jacket
Its really important to mark the notch here to get the princess line seam at the bust point
I lowered my armhole by 2cm so that it creates ease
for the wearer and its not too tight
Sleeve length : 23 cm
Side seam length: 9cm, this should
match the side seam of my back.
I wanted to do a facing for my hem so that the jacket has a proper finishing on the inside. So I did a 1.5cm height facing.
I also did a facing for the centre front, so that when the "lapel" is flipped out and open, there is no raw edge shown. So i marked the facing from the centre front and curved down from the shoulder seam.
When cutting out the final patterns its really important that the length of my shoulder seam of the centre front and the shoulder seam of the facing matches, and there should not be any long short.
Removing the dart, and moving out by 0.5cm to create a better fit.
Lowering the neckline by 1.2cm and reinstating the curve to create more comfort and ease for the wearer.

For my back, similarly to the front, ensure that the facing for the hem are at equal lengths, side seam length is same as the front, length of the top is also the same at the front.
Sleeve length: 22cm
Same thing for the sleeves as the front we go down by 1cm.
Side seam length : 9cm
Hem 8cm down bust point.
For my back, I wanted
to incorporate style lines.
So I did a cut and sew seam. Ensure that my notches are marked so that I can match them correctly when sewing.
For the dart, at the back
we first moved out 0.5cm but then realised it might be too big, so we decided to stay with a smaller dart.
I needed a facing for my back neckline as well to hide the raw edges of the garment. My facing should be the same length as my shoulder seam and there should not be any long short.
Neckline was also lowered by 0.5cm and shoulder seam moved out by 1.2cm
MASTER PLAN SLEEVES ANNOTATIONS


For my sleeves,
I first separated my back
and front and traced them out separately from my sleeve block. I have to ensure that whatever changes I do to my front has to be done to my back because they are identical pieces sewn together.
The curves on my sleeve for both back and front should be identical and must match correctly. Thus, the notches marked on the curve are really important so that it will be easier for me during sewing.
We moved in by 1cm here so that it would not be too loose and too much space from under the arm
Since I have a belt loop/ waistband insert on my sleeves I had to mark on my master plan so that when cutting my final pattern I know where it is marked.
MASTER PLAN SKIRT FRONT/BACK ANNOTATION


For the dart on the centre front we closed the dart on the waistband and for the centre front we moved the dart to the side seam.
For the skirt I did not want it to be too straight so I curved in at the side seam by moving in 2cm
For the waistband, the top and the bottom waistband had different heights of 3cm and 4cm respectively.
I ensured that I marked where I wanted the waistband insert to be clearly, the first insert is at the seam line where the zipper is ending and the second insert is 36cm down the first insert.
There is a cut and sew seam on the skirt for the zipper and with the loop it will be able to cover the seam.
The slit notch is marked
16cm up from the hem line
For the back similarly to the front we marked the waistband at 3cm and 4cm and closed the dart at the waistband.
Theres a zipper at the back from the waistband down, created a notch for the the zipper and a cut and sew seam to separate the top panel and bottom panel. Since there is a zipper at the centre back for the top panel, I had to move in 0.5cm as well.
Zipper length: 40 cm
(Metal zipper)
I have to ensure that the waistband line drawn is not too straight and it follows the curve of the skirt block.
There are two pockets at the back a functional pocket at 10cm length and non-functional decorative pocket at 12cm length. Non-functional pocket is 2cm away from the centre back and functional pocket 4cm away from the non-functional pocket. Then I marked cross on the lines of the pocket to know where to place it when sewing.
Same as the front, moved in 2cm at the end of the skirt and curved it in. The slit is also notched 16cm above the hem.
FRONT
BACK
LEARNING POINTS:
For my garment, this semester, I think the more challenging part to draft was my top because we wanted to do a shirt collar that opens up like a lapel without drafting a tailored collar. However, I think step by step and with consultation I was able to achieve it. I think one of my biggest take away is to be more confident and I should not be afraid to try. I have to try and if it works, it works but if it does not work, I can just learn from the mistake and try a different method. I really wanted to perfect my masterplan so that my final pattern will be accurate and I would not have difficulties when sewing my garment. For my sleeves especially I thought it would be hard to draft the curves, but I realise its pretty straight forward when I separate the back and front and draft it separately. I just needed to ensure they are both identical and the curves match because I am sewing them together. For my skirt, it was more straightforward, as it is a simple long skirt, but I needed to know and understand where to put my notches especially since I have small details such as the strap, the belt loops, the zipper and the slit. I also learnt that for drafting it is important to be able to understand measurements because most of the time its an eye judgment to realise if this measurement is too long or too short. I think drafting for this semester was more comforting then the previous semester because I was able to headstart most of the drafting by myself after consultations. I was able to come up with my masterplan and then go to my lecturers for further review and reinforce changes.
INTERMEDIATE PATTERNS
Intermediate sewing patterns helps the dress making skills progress to the next level. We need intermediate patterns for collars and waistband.


For the collar intermediate pattern, I measured my back neck (9cm) and front neck (13.7cm) and notches the middle which is the shoulder point. Then from the centre back, I moved up 3cm and created a curve angle to create the sharp collar. From this intermediate pattern, I can trace out my final pattern with seam allowance.
For the waistband similar to my collar, I traced out from my master plan from the centre back to the centre front and marked the notches on the shoulder line. For the centre back since theres a zipper I need to remove 0.5cm from the centre back. The important points of my waistband intermediate patterns is my notches so that it is easier to sew and they match when cutting the fabric. After that, I had to reinforce all my lines and make sure there are no sharp angles and its a smooth curve.
FINAL PATTERNS
Final pattern – provided with the necessary symbols that will guide the cutter on how to lay out the pattern on the cloth. Symbols for darts, seam allowances, grain line, center fold, and notches and other markers are used.
DENIM CROPPED BLOUSE


DENIM LONG SKIRT
Side seam allowance: 1.5cm,
Other seam allowance: 1cm
Seam allowance: 1cm
Side seam allowance: 1.5cm,
Other seam allowance: 1cm
Seam allowance: 1cm
Seam allowance: 1cm
Seam allowance: 1cm
Seam allowance: 1cm
Seam allowance: 1cm,
Hem seam allowance: 3cm
Seam allowance: 1cm
Seam allowance: 1cm

Seam allowance: 1cm

Seam allowance: 1cm

Seam allowance: 1cm

Seam allowance: 1cm

Side seam allowance: 1.5cm,
Other seam allowance: 1cm

Side seam allowance: 1.5cm,
Zipper seam allowance: 4cm
Other seam allowance: 1cm


Top seam allowance: 3cm
Other seam allowance: 1cm
Top seam allowance: 3cm
Other seam allowance: 1cm
Side seam allowance: 1.5cm,
Other seam allowance: 1cm
Hem: 1cm
CONSTRUCTING TOILE GARMENT
Sewing process...
CUTTING CALICO AND MARKING NOTCHES


I cut out the calico based on my final patterns and ensured that all my notches are also properly snipped and cut. Before cutting, I ensured that all my seam allowances are correct because once it is cut, it will be hard to rectify. Notches are really important in sewing especially on tight garments as they provide an important guideline for matching up corresponding seams and edges in the sewing process.


For my back I have darts, initially in my master plan for my darts I went out 0.5cm but then I realised that after sewing it was looking very pointy for the back. So I changed the master plan and removed the 0.5cm and sew it again. After sewing it again, it was less pointy and looked better.

BEFORE

Then, I completed my back by sewing the centre panel of the back and the side seams together. The back is quite simple because its just a cut and sew seam, and later on to imitate the techniques of jeans I wanted to do top stitching along the seams. I always pin it first according to the seam allowance before sewing it and ensures that all notches match so that there will less unpicking later on.

SEWING THE BACK BODICE
SEWING THE FRONT BODICE

Sewing the front bodice is quite simple because I just have to attach the side panel to the centre panel. It could be challenging if the notches are not marked correctly. For mine, I ensured that my notches are snipped clearly so that sewing process is easier for me. I have to ensure that the shoulder length are also matching on both sides.
ATTACHING FRONT & BACK


I added two lines of top stitching lines with a contrasting colour thread to imitate the jeans seams and all the cut and sew seam lines. After the top stitching, I attached the front and back together by sewing the shoulder seams at 1cm seam allowance and the side seams at 1.5cm seam allowance. My final patterns were accurate as there were no long short lengths on the fabric when matching the seams together.
ATTACHING SHOULDER SEAMS

ATTACHING SIDE SEAMS

After attaching the side seams, the silhouette of the garment was more clear and obvious to my technical flats. I wanted my garment to be really cropped and tight and I felt like after sewing it, it looked more clear to my technical flats.
FACING FOR NECK FOR CENTRE FRONT/ BACK & HEM


I had to attach my back facing of the neckline to my front facing of the centre front. It was important to have a facing for my garment because the collar was going to open up and look like a lapel. If there was no facing, it will look like the garment is not finished and the raw edges will be exposed. With the facing, it gives a proper finishing on the garment edge. The facing measurements have to measure the same as bodice so that when attached to the bodice there will be no long short lengths. The facing should also be fused with interfacing because it prevents stretching or sagging of the neckline, acts as reinforcement for the area, and gives the garment a smooth but firm body.
My top garment is very short and it ends just right under the bust and since I left my hem a seam allowance of 1cm I had to make a facing for my hem to give a proper professional finishing as well. After sewing the facing, I had to snip along the stitched allowance to ensure that it curves properly on the hem. After turning it inside out, I hand tagged seamlessly at some areas so that it does not fall out and stays up right.
INTERFACING
SITS ON WEARERS BODY
SEWING THE COLLAR AND ATTACHING TO NECKLINE


For the collar, I was doing a sharp edge shirt collar, I have to cut 2x of the pattern and fuse interface on one side of the collar so that it is more stiff and holds the shape of the collar. Then I sewed them together with both right side facing each other with one opening to turn them inside out. The first time I stitched them together I did them wrongly because I sewed the neckline and thats where I should attached the collar, so I had to unpick and sew the collar again. After sewing them correctly, I need to snip the curve side and the sharp edges so that it retains the shape when it turns inside out.
WRONG
IT HAS TO BE OPEN
CORRECT


After turning it to the right side, I iron the collar flat and ensure that the sharp edges are sharp. Before attaching the collar to the neckline, I did one line of top stitching on the collar. After that I attached it to the neckline by matching it with the notches at the centre front and the centre back. After sewing it, I checked if there were any folds on the collar and if the stitching lines were aligned properly and no tension in the fabric.
COLLAR WITH FACING

FRONT FACING


BACK FACING

After attaching the collar, I went out to attach the facing, since the facing is one piece I can just sandwich the collar in between and attach the facing, this will hide the collar stitching and with the facing it will be a proper finishing. The facing has interface on one side so when sewing them to the bodice ensure that the interface side is always facing inside and the calico side is facing outside.
For the hem as well I attached the facing and attached the hem facing together with the other facing so that it looks like one pieces when you see the construction inside the garment. For the hem, after I attached it I also did a 0.5cm top stitching at the bottom so that it stays upright and hand tagged seamlessly at certain areas.This is to ensure that the facing is secured and does not drop down to show a better construction of the garment.

SEWING THE SLEEVES AND ATTACHING TO THE BODICE


For the sleeves, both the back and the front are identical pieces, with the notches marked at the curves, I had to match them and sew them together. Sew everything except the arm hole opening and the hem. After sewing I snipped the curve parts so that when I turn it inside out it retains the shape and gives me a nice smooth curve. After turning it inside out I iron it flat so that the curve is more clearly seen.
After sewing the back and front pieces together, I sewed the hem of the sleeves. The hem had a 3cm seam allowance so I did the hem by folding 1.5cm and another 1.5cm. It was really hard to sew the hem because of how small the opening was. At the ending of the curve, it was hard to sew in the machine cause the edge were really hard to see and it need a proper V at a 1.5cm allowance. After sewing the hem and compared it to my technical flats I realised that this was not the hem I wanted. I wanted a cuff at the end of the sleeves so I was thinking of altering my master plans for my actual after consulting with my lecturers on which is better. I also attached the sleeves to the armhole by matching the shoulder seams and the side seams.


HAND-
STITCHED


TOP STITCHING FOR COLLAR AND HEM
After attaching the sleeves to the bodice, I realised that the curve part of the sleeves were dropping espeically the centre ones and that was not what I intended. I need the curve part to be more stiff and I wanted it to stand. So I decided to redo my left side of the sleeve with interfacing and redo everything again. I only fused one side of interfacing for this sleeve and attach it to the bodice. After comparing both sleeves on the tailor dummy and shirley, I realised the seleves with the interfacing was working better and I like the way it was structured. After consultation with lecturers, I was advised to put interfacing on both the front and back of the sleeves instead of one side so that it will be more structured and the shapes flows nicely.


INTERFACING
HEM STITCHING


After sewing the bodice with the sleeves, I completed it by sewing the top stitching lines on the centre front that opens up so that it imitates the stitching of a biker jacket. I also finished up by top stitching the hem of the top so that it looks complete. Both the inside and outside of the centre front had the top stitching because its open inside and out.
FINISHED TOP TOILE
SEWING THE POCKET


INSPIRATION


Before sewing the pockets on the skirt, I had to sew the darts for the back skirt first the same way I did for the top by tracing the darts on to the chaco paper and calico. Then after that, I marked where I wanted the pockets to be according to the master plan so that I know where to sew them later on. I put it on the tailor dummy when I marked where the pockets should be placed, so that they are straight and not slanted.
For the pockets, I did not take much process pictures but I started off by folding in all the seam allowance first and then ironing it so that the seam stays when sewing them. So I had two pockets , the bigger one is for decorative purpose while the smaller one is a functional pocket. For the decorative pocket I sealed the opening as you can see in the second image. I also did two lines of top stitching for both pockets to show the similarity to a denim jeans pocket. I also did a decorative stitch at the centre of the pocket taking inspiration from Levis' and Calvin Klein jeans pockets.
SEWING THE WAISTBAND / ATTACHING TOP AND BOTTOM PANEL TOGETHER


Sewing the waistband was one thing that was the most difficult for me mainly because there was so many small parts and the first time I cut it I forgot to label which one is top and bottom so I had to go back to the patterns to ensure that its properly matched. The side seams have to be sewed with the side seams and the centre front with the centre front. The centre back has to be sewed with the zipper later on. Before sewing two sides of the waistband, I have to fuse interfacing to one side of the waistband. Interfacing is used to give fabric more structure, body or stability. It is applied to the wrong side of the fabric and isn't visible in the finished garment.
After that I sewed both sides with the right side facing each other and then turning them inside out and iron it flat. I did the same thing for the second waistband as well. It is important that all the seams matches with the notches and it is snipped because It makes the seam allowance expand with the main area of the fabric. Once your finish clipping and turn it right side out the curve lays flat and can easily be pressed smooth. After pressing them both down, the waistband was ready to be attached to the skirt.
I folded in 1cm seam allowance on the bottom waistband and pressed it and matched it with the seam that is attached to the top of the skirt with the waistband. I pinned it vertically so that it is easier to sew it, ensure that it matches properly as well with the seams. For this I cant sew the waistband yet, because I have not attached the zipper. I just pinned it to see how it looks with the skirt and the double waistband together.


ATTACHING THE TOP PANEL TO BOTTOM PANEL


For the top panel of the skirt, it was quite straight forward to sew, the centre front is cut on fold so I just needed to attach the side seam of the front to both of the back and finish the back with the zipper which will be sewn later. It was important to match the side seam of the waistband and side seam of the skirt together so that it looks like one straight continuous seam. After the zipper is sewn, I will add on the top stitching lines on the waistband and add on the centre front stitch as well.
For the bottom panel same as the top panel I just had to sew the both side seams of the back to the centre front on fold but before sewing that I had to over lock the side seams first so that I will have an open seam later on to sew the slits. After that, I pinned the top panel to the bottom panel together by matching the seams and made sure they aligned as one straight seam properly matched together.
SEWING THE SIDE SLIT


For my slit, I measured 15cm for the slit, I can make the slit too long because I have the loops. I think the length of the slit is meant to be discussed again with my lecturers on whats the appropriate length for the slits.
For the sewing of the slit, I folded in 1.5cm seam allowance same as the side seam of the skirt and sewed following the pins. For the stitching of the slit, I am still considering if i should use contrast stitching.


CURRENT PROGRESS
OF THE SKIRT
ATTACHING OPEN ENDED ZIPPER TO CENTRE BACK AND COMPLETING WAISTBAND


When sewing the zipper, I realised that the zipper I bought was not the correct zipper, I needed the metal zipper where I remove the zipper teeth manually. However, since I had this zipper, I wanted to sew it for the toile to see the look of the garment. Sewed the zipper by placing it from the start point of the centre back all the way down to where it ends at the notch. I pinned it down first and zipped it to ensure there is no long short.


After sewing the zipper, I had to complete the waistband. Since the zipper is starting at the waistband, for a clean finishing, I can sandwich the zipper in between the waistband since there are two layers of the waistband. I folded in the waistband and sandwiched the zipper in between sewed against the same stitching line to ensure that it is secured. After that, I checked if the zipper was able to zip all the way up without any long short.


Ensure no long short when zipped up

Fold in and sandwiched the zipper in between the two layers of waistband


Fold 1cm seam allowance and match the seam allowance below


This was the process of completing the waistband, I sewed the waistband together first as explained above, but to complete it I needed to be done sewing the zipper first. After sandwiching the zipper in between the waistband, I folded and pressed the waistband seam allowance at 1cm and matched the other seam allowance facing up and used the pin to pin vertically. Then, I sewed at half presser footer (0.5cm) and did one row of top stitching to complete the waistband not too close to the edge.
ATTACHING & MAKING THE BELT LOOPS AND BELT / HEM


For my skirt hem its 1cm seam allowance, so I did a double fold hem by folding it 0.5cm by 0.5cm. I marked the 0.5cm with a tailor chalk and then pressed it with an iron so that its more accurate and then fold another 0.5cm. Pressed it and pinned it so that it does not unravel. Then, I stitch close to the open folded edge. Because the bobbin thread will show on the right side of the garment, it is important to check the bobbin sewing machine tension is correct before you start.
First when my sew my belt loops, it was only 1cm width and I realised it was too small, then I resew my belt loops and made the width at 2cm. That was better and it was the right width of my belt loops. I did one row of stitching on both side of the belt loops and gave a 1cm seam allowance to stitch onto the skirt.
Then I did the strap same way as sewing the belt loops but did it at a width of 4cm. I sewed one row of stitching on both side. Then I tried putting the strap on the belt loops and it fit well. I did not want the strap to crunch the skirt, so I sewed it in a way there is allowance and ease for movement. I also realised that after sewing the distance between the top strap and the bottom strap can actually be shorter and the strap hanging down can be longer.
FINAL TOILE

FRONT

BACK
REFLECTION
This is my final toile for this semester, I was really happy with the final product and how it turned out according to my technical flats and illustration. I felt that this semester I was rather independent in the sewing process because my final pattern were straightforward and my notches were marked accurately, this made it easy to follow through the sewing process. I think by being more independent during the sewing process I was able to show my lecturer a weekly progress report and was able to make the required changes if necessary. This helped me to manage my time well and I was able to do them step by step at my own phase and time. Though I had some things to improve on such as sewing the belt loops and straps, I realised should have sewed it on the garment first before finishing the garment, because it is more harder to sew it on later. After the toile evaluation, there were some parts I had to work on and alter my master plans such as the darts at the back of my top it was not necessary and the curves of my sleeves, I can make it bigger on the top of my sleeves and toned it down in the middle. I have to always also note to iron my fabric first before sewing and cutting as not ironing your fabric before cutting can result in inaccurate cuts, and as a result affect the overall fit and of course appearance of the garment. I have to ensure that after every step of sewing I need to press and iron the seams so that it has a proper finishing. I am really contented with my toile and I am looking forward to do my actual garment after rectifying certain parts of my master plan.